从零开始使用Spring Cloud Config
在传统的Java应用中,应用配置都是直接存储在代码库中(比如放在application.yml中),配置的更新需要修改发布包并重新发布。
而配置的审计也会和代码夹杂,需要从众多提交中中找到配置变更的提交,很难独立完成,也很难追溯何时修改了某一项配置。
随着微服务的发展,服务越来越多、配置也越来越多,这种原始的配置管理方式,很难适应分布式环境。作为开发者,还是需要配置能单独地管理和审计。
Spring Cloud Config就提供了配置管理和审计的解决方案。
Spring Cloud Config有如下特点:
- 与Spring生态紧密集成
提供了和Spring中的Environment、PropertySource一致的抽象,能够和原有的配置文件很好的对应起来。 - 可以动态更新
只需要添加注解,不需要重启就能更新配置项 - 支持多种provider
配置仓库可以是git仓库、本地文件、数据库等等。
开始使用Spring Cloud config
Spring Cloud Config 分为两部分:
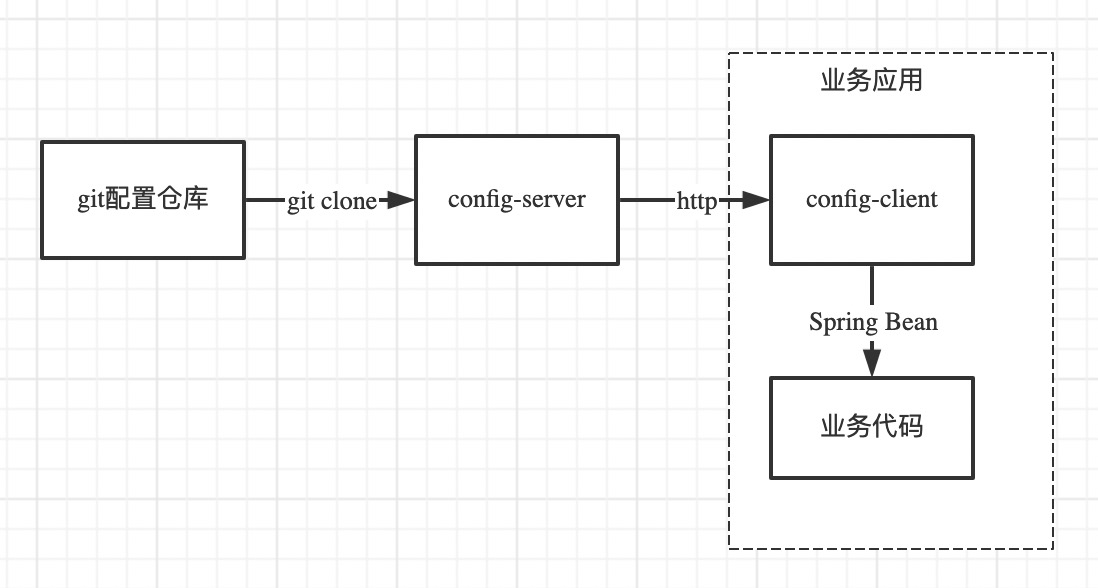
Spring Cloud Config Server负责从配置仓库中获取配置,并给client提供获取配置的HTTP接口
Spring Cloud Config Client负责给目标应用提供从config-server获取配置、更新配置的能力。
整个流程如下:
Spring Cloud Config Server搭建
首先创建一个配置仓库。在本例中,为方便演示,示例代码仓库的/config-repo/目录作为配置仓库。
在配置目录中建立文件neo-config-dev.properties(文件格式为{application}-{profile}.properties):
1 | neo.hello=hello im dev update1 |
当然,你也可以添加 neo-config-{prod,test}.properties 等配置来管理其他profile的配置。
然后在示例代码库中,建立一个 spring-cloud-config-server 目录来作为config-server的目录。
在spring-boot标准应用的基础上,在Application类上添加注解@EnableConfigServer表示提供配置服务:
1 |
|
然后在application.yml中配置git作为配置仓库:
1 | server: |
Spring Cloud Config也提供本地存储配置的方式。我们只需要设置属性spring.profiles.active=native,Config Server会默认从应用的src/main/resource目录下检索配置文件。也可以通过spring.cloud.config.server.native.searchLocations=file:E:/properties/属性来指定配置文件的位置。虽然Spring Cloud Config提供了这样的功能,但是为了支持更好的管理内容和版本控制的功能,还是推荐使用git的方式。
配置好了之后,就可以直接启动config-server了。
访问config-server
启动好之后,就能访问链接来获取配置了。
访问http://localhost:8001/neo-config/dev(通用url格式是http://localhost:8001/{application}/{profile})可以看到配置信息:
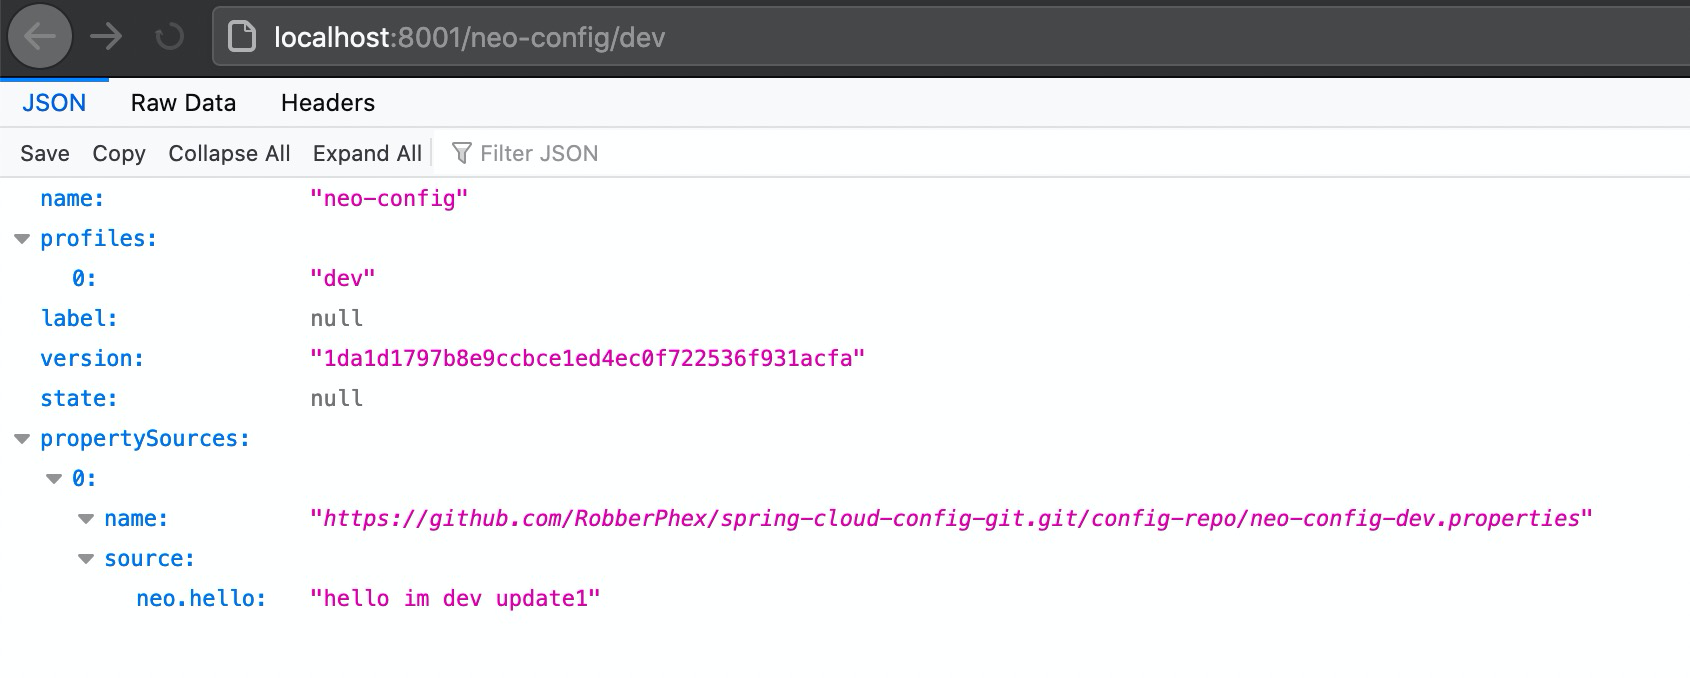
上述的返回的信息包含了配置文件的位置、版本、配置文件的名称以及配置文件中的具体内容,说明server端已经成功获取了git仓库的配置信息。
也可以直接访问http://localhost:8001/neo-config-dev.properties来获取文本格式的配置信息:
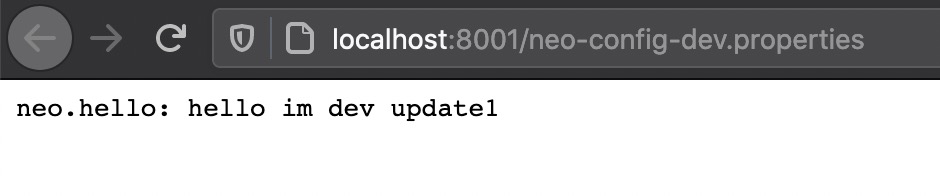
推荐使用json方式来检查配置,因为client使用的就是json格式的接口。
配置更新
将配置目录中的neo-config-dev.properties更新为:
1 | neo.hello=hello im dev update2 |
然后提交到github。
等待10秒后,访问配置接口,检查配置是否更新:
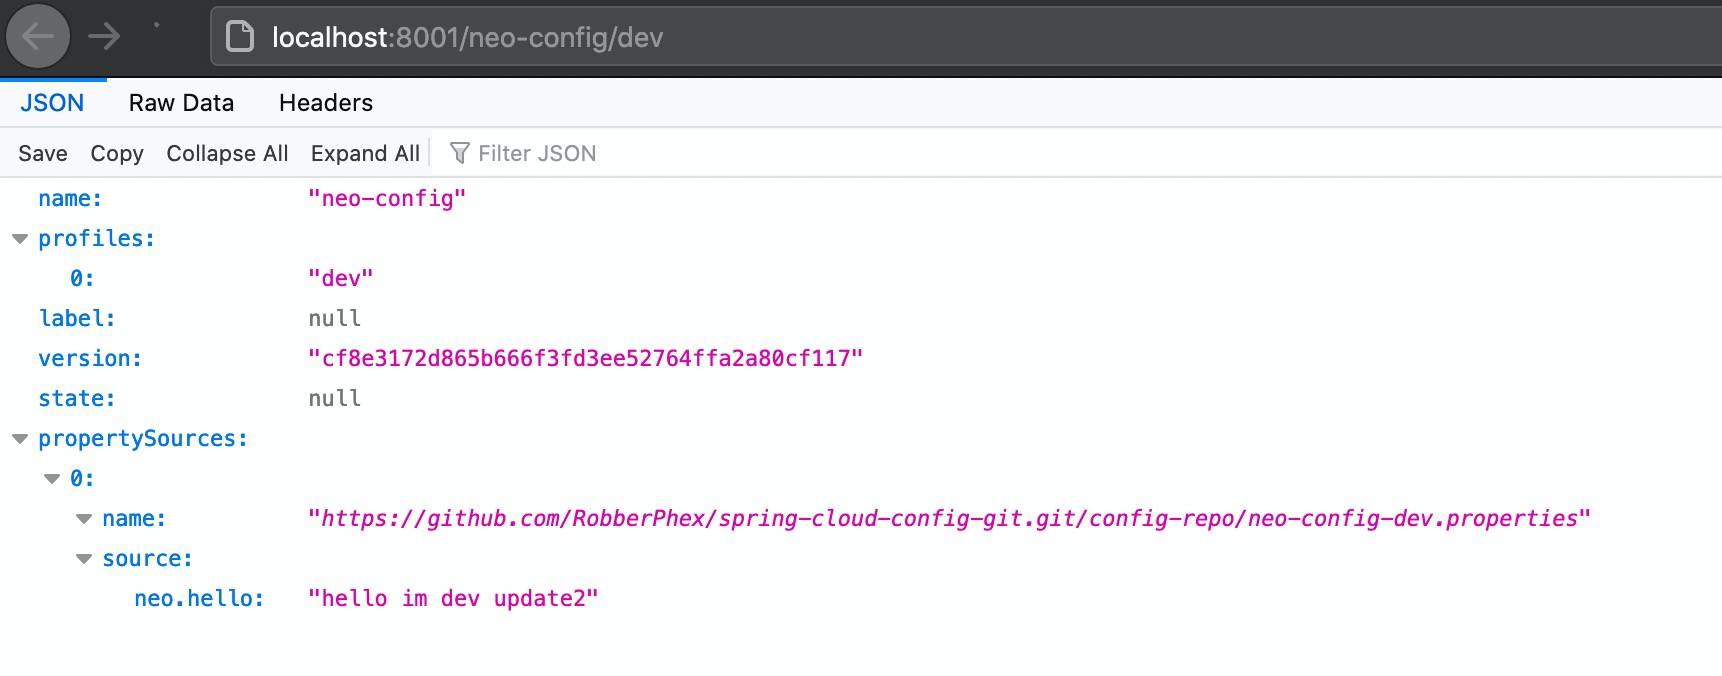
如图,可以确认config-server能够正常工作。
config-client配置
创建spring-cloud-config-client目录,添加依赖
1 | <properties> |
需要配置两个配置文件,application.properties和bootstrap.properties:
1 | # spring配置 |
1 | # spring cloud config配置,获取配置时使用 |
然后在业务Controller中使用配置项:
1 | // 通过 Spring Cloud 原生注解 @RefreshScope 实现配置自动更新 |
然后启动,访问http://localhost:8002/hello检查是否获取了最新配置。

配置动态更新
首先,更新配置目录,更新neo-config-dev.properties文件,并提交到github:
1 | neo.hello=hello im dev update3 |
等待10秒后,调用client侧的更新接口,来更新配置:
1 | curl -XPOST localhost:8002/refresh |
此时再访问http://localhost:8002/hello,检查是否获取了最新配置:
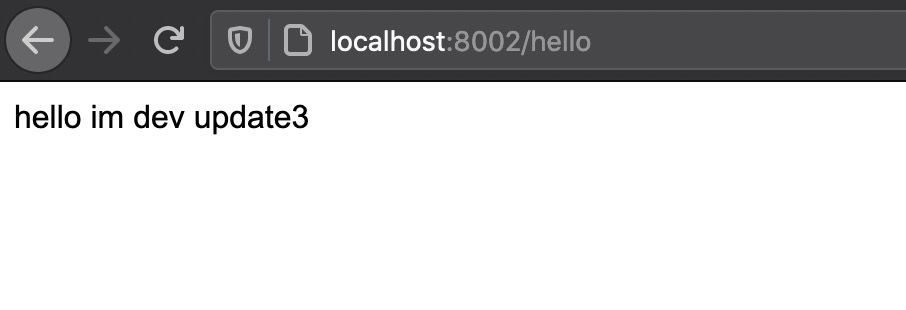
可以看到,此时config-client已经获取到了最新配置。
总结
本文搭建了从git配置文件到config-server,再到confing-client的整个配置获取、更新流程,实践了Spring Cloud Config的使用。
但是,在生产环境中使用,还需要注意如下几点:
高可用
默认在config-client的配置中,spring.cloud.config.uri指向的机器是故障单点。
可以用eureka做服务注册,确保一台config-server挂了之后,config-client还能从其他config-server获取配置。
配置自动更新
目前的配置自动更新是通过手动调用refresh接口来实现的。
在生产环境中,可以用git的webhook发送配置更新消息给mq,然后Spring Cloud Bus在客户端自动执行配置的更新操作,确保配置的实时更新。
一揽子解决方案
Spring Cloud Config作为一个比较底层的解决方案,需要结合eureka、Spring Cloud Bus、actuator来实现高可用、配置自动更新等功能。
而直接使用阿里云的ACM+nacos-config,可以只配置client就可以用了。请参考如何从Spring Cloud Config迁移到阿里云ACM。
本文的示例代码在 GitHub。
从零开始使用Spring Cloud Config