通过DNS认证来部署Let's Encrypt
原来是通过http认证的方式来完成ACME 的 Identifier Validation Challenges,但是内网的机器就无法完成这个认证,今天看了下,LE支持dns认证了,所以实践了一下。
安装
首先安装Certbot,按照官网操作即可: https://certbot.eff.org/instructions。
生成证书
然后执行
1 | certbot -d ssl-test.robberphex.com \ |
对于MacOS用户来说,可以执行
1 | certbot --config-dir /usr/local/etc/letsencrypt \ |
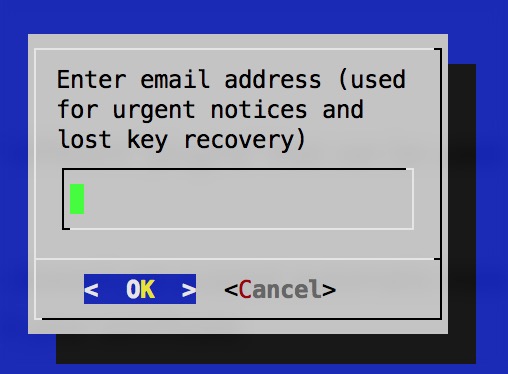
- 需要输入邮箱
- 同意用户协议

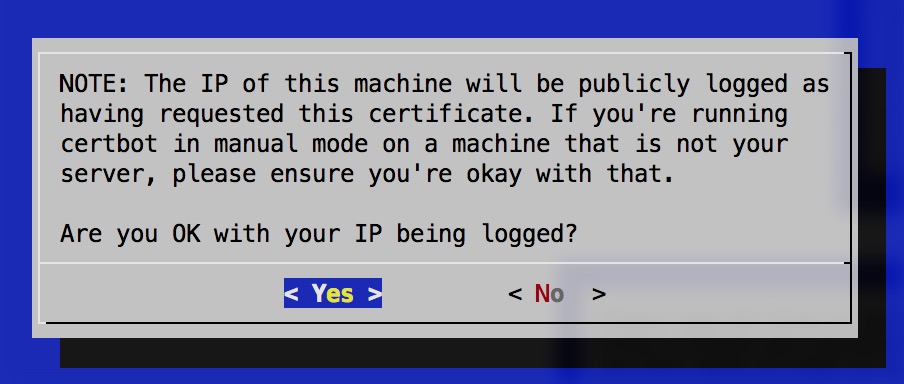
- 同意记录IP
- 设置域名的TXT记录
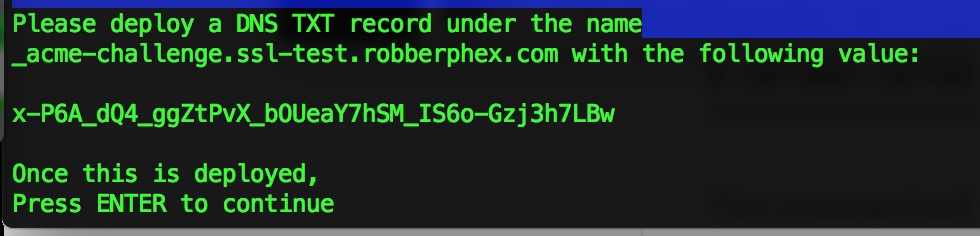 比如图中,设置
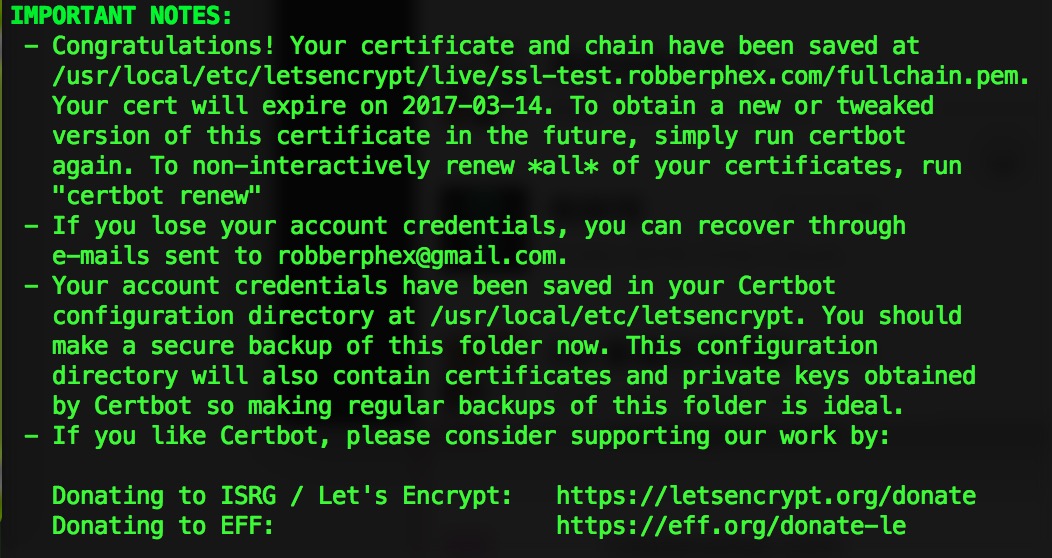
_acme-challenge.ssl-test.robberphex.com的TXT记录为x-P6A_dQ4_ggZtPvX_bOUeaY7hSM_IS6o-Gzj3h7LBw,然后回车。 - 提示证书生成成功